Helpers
Following is the list of globally available helpers within Edge templates.
html.classNames
The html.classNames helper method is used to serialize an array of classes to a string. The array can contain either strings or objects with conditional classes. For example:
<input class="{{
  html.classNames([
    'input',
    {
      'input-error': false,
      'input-disabled': true,
      'input-large': size === 'large',
      'input-medium': size === 'medium',
      'input-rounded': true
    },
  ])
}}" />
Given the value of size is medium following will be the output HTML.
<input class="input input-disabled input-medium input-rounded" />
html.attrs
The html.attrs helper converts an object to HTML attributes. For example:
<input {{
  html.attrs({
    id: 'name',
    placeholder: 'Enter your name',
    value: user.name
  })
}} />
Given the value of user.name is null, following will be the output HTML.
<input id="name" placeholder="Enter your name" />
The value of the attributes object must be a string, boolean, or an array of strings. If the value is undefined, null, false, or an empty string, the attribute will be removed from the output.
| Value | Serialized output |
|---|---|
string | Serialized as it is in the output |
string[] | Array values can be concatenated either with a comma, or the space character depending upon the attribute. |
false | Attribute will be removed from the serialized output. The same behavior is applied for null and undefined values. |
true | Dependending upon the attribute, either the value will be serialized to a string or just the attribute will be defined |
Serializing the class attribute
The html.attrs method gives special attention to the class attribute. The value of the class property can be a string, an array of strings or an object.
Under the hood, the html.classNames method is used to serialize the class attributes.
<input {{
  html.attrs({
    class: [
      'input',
      'input-large',
      {
        'input-error': hasError,
      },
    ]
  })
}} />
Output
<!-- hasError = false -->
<input class="input input-large" />

<!-- hasError = true -->
<input class="input input-large input-error" />
nl2br
Converts new lines to HTML <br /> tags. Since, the nl2br helper returns an HTML string (with break tags), you must use three curly braces to render the HTML as it is.
{{{ nl2br(post.content) }}}
If you want to escape the contents given to the nl2br method, you can wrap that inside the html.escape method.
In the following example, the <br /> tags will be not be escaped, however, the post.content will be escaped.
{{{
  nl2br(
    html.escape(post.content)
  )
}}}
html.escape
Escape HTML inside a string value. The double curly braces already escape the value, so use this method only when you are using the triple curly braces.
{{{ html.escape(post.content) }}}
truncate
Truncate a string value to a given number of characters. For example:
{{
  truncate(
    'This is a very long sentence that i would like to be shortened',
    18
  )
}}

<!-- Output: This is a very long... -->
The truncate method doesn't chop the words in between and let them get completed. However, you can turn off this behavior by disabling the completeWords option.
{{
  truncate(
    'This is a very long sentence that i would like to be shortened',
    18,
    { completeWords: false }
  )
}}

<!-- Output: This is a very lon... -->
Also, you can define a custom suffix for the truncated string.
{{
  truncate(
    'This is a very long sentence that i would like to be shortened',
    18,
    { suffix: ' [Read more]' }
  )
}}

<!-- Output: This is a very long [Read more] -->
excerpt
The excerpt method is similar to the truncate method. However, this method first removes the HTML tags, truncates the string and returns back plain text. Therefore, it is more suitable, if you want to generate an excerpt from HTML contents.
{{
  excerpt(
    '<p> Hello, this is a dummy <strong> post </strong> </p>',
    20
  )
}}

<!-- Output: Hello, this is a dummy... -->
You can disable completeWords option to perform strict truncation.
{{
  excerpt(
    '<p> Hello, this is a dummy <strong> post </strong> </p>',
    20,
    { completeWords: false }
  )
}}

<!-- Output: Hello, this is a du... -->
Finally, you also provide a suffix to use.
{{
  excerpt(
    '<p> Hello, this is a dummy <strong> post </strong> </p>',
    20,
    { suffix: ' [Read more]' }
  )
}}

<!-- Output: Hello, this is a dummy [Read more] -->
inspect
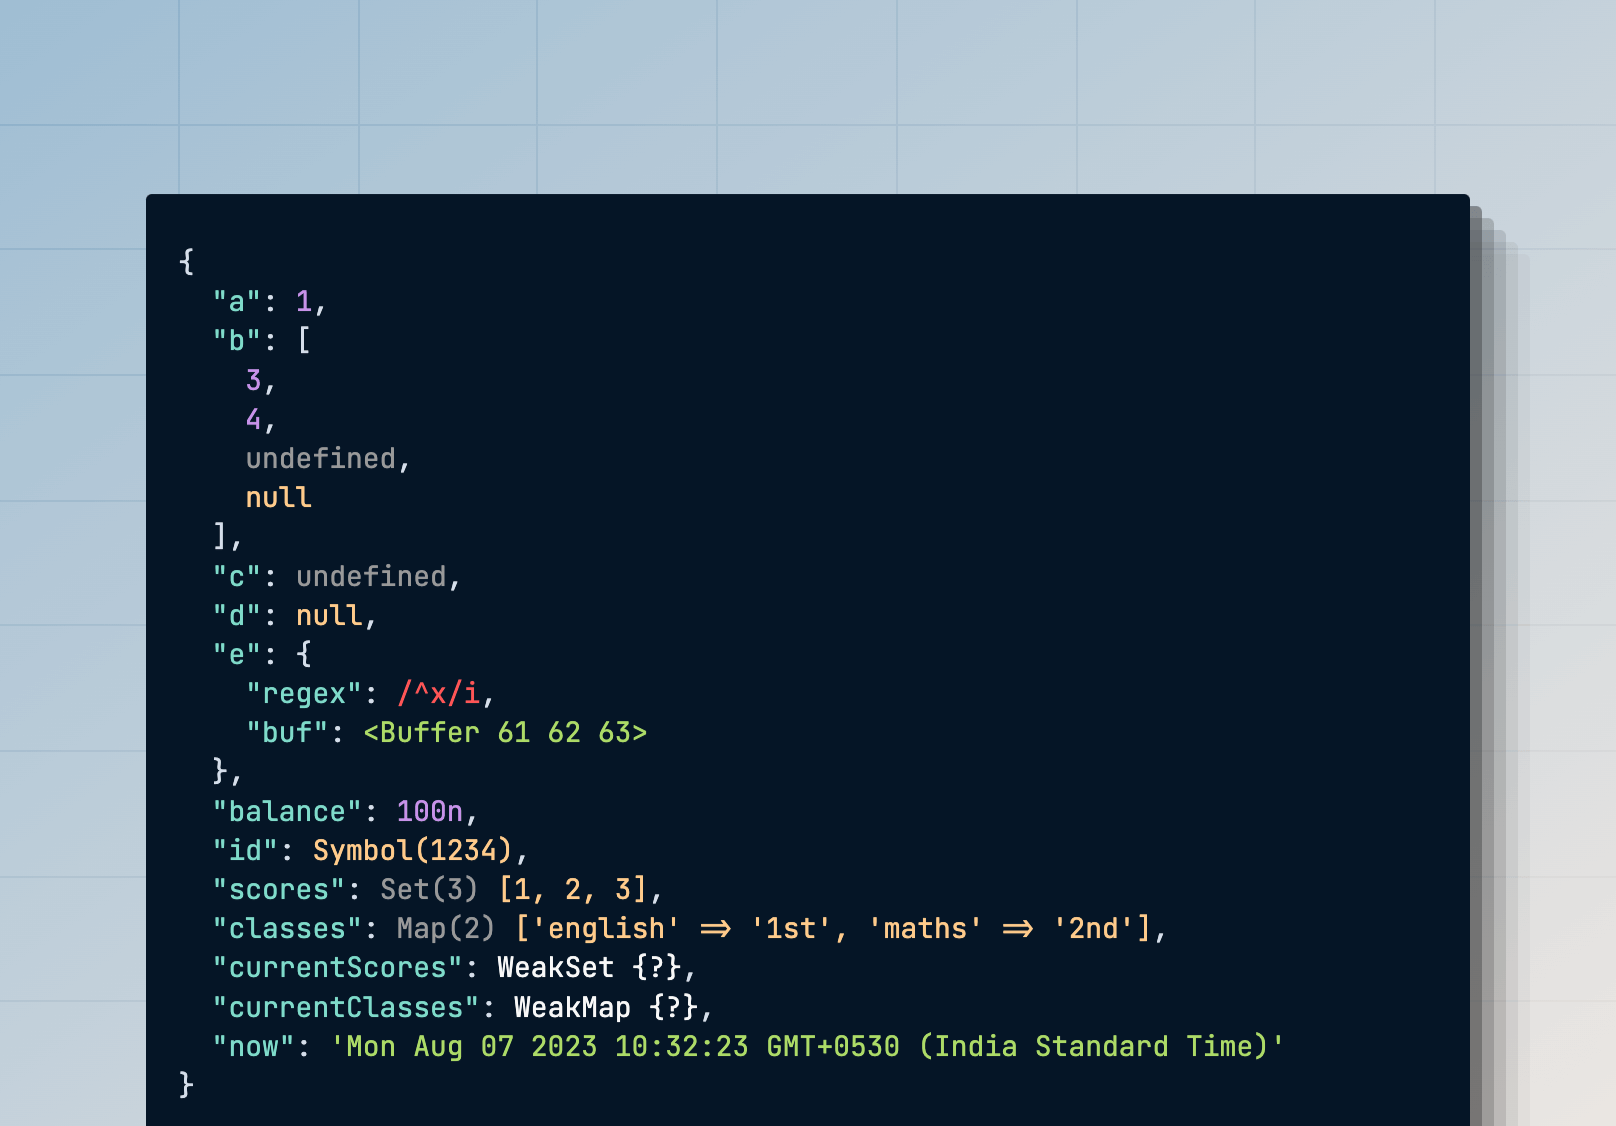
You can use the inspect method to pretty print a value for debugging. The inspect helper returns HTML, which you must view in a browser for better readability.
{{
  inspect({
    a: 1,
    b: [3, 4, undefined, null],
    c: undefined,
    d: null,
    e: {
      regex: /^x/i,
      buf: Buffer.from('abc'),
    },
    balance: BigInt(100),
    id: Symbol('1234'),
    scores: new Set([1, 2, 3]),
    classes: new Map([['english', '1st'], ['maths', '2nd']]),
    currentScores: new WeakSet([[1, 2, 3]]),
    currentClasses: new WeakMap([[['english', '1st'], ['maths', '2nd']]]),
    now: new Date()
  })
}}
Output

Changing case
You can use one of the following methods to transform a string case.
{{ camelCase('hello-world') }}     // Output: helloWorld
{{ snakeCase('hello-world') }}     // Output: hello_world
{{ dashCase('HelloWorld') }}       // Output: hello-world
{{ pascalCase('hello-world') }}    // Output: HelloWorld
{{ capitalCase('hello-world') }}   // Output: Hello-World
{{ sentenceCase('hello-world') }}  // Output: Hello world
{{ dotCase('hello-world') }}       // Output: hello.world
{{ noCase('hello-world') }}        // Output: hello world
{{ titleCase('hello-world') }}     // Output: Hello-World